Why Sealing Pavers Is Worth It
Outdoor pavers face constant challenges from dirt, water, UV, and weeds. Learning how to seal pavers provides a solid shield against all these elements. Sealing is not just cosmetic; it adds strength to your surface. The process ensures your pavers stay bright, durable, and easier to maintain for years ahead.
This guide covers four major areas: cleaning, sealing, products, and maintenance. Each area is vital and must be addressed for the best outcome. Cleaning ensures dirt and growth do not get trapped. Sealing adds a shield that blocks water and stains. The right product enhances both look and durability. Maintenance ensures your effort lasts longer. Together, these parts form a complete system of care and will help you learn How To Clean And Seal Landscape Pavers smoothly and naturally.
By the end, you will have full knowledge of how to keep pavers in great form. The steps in this paver sealing guide are clear, simple, and backed with practical knowledge. Whether you work on a patio, path, or drive, the results will reward your time. Once finished, your outdoor flooring care will be easier and more reliable.
Benefits and Drawbacks of Sealing Pavers
What Sealing Can Do and What It Can’t
Pros of Sealing Pavers
Sealing protects pavers from stains. Oil, grease, and wine spills no longer ruin the look. Instead, sealed surfaces resist and allow for easy wiping and wash. This makes sealed areas shine longer with less work. Add to that, stains do not sink deep into pores, which means cleaning stays simple and fast.
Sealing reduces fading caused by harsh UV rays. With time, unsealed pavers grow pale and lose their appeal. A good seal locks in color for longer. Your pavers stay lively even under long sun exposure. This color gives more visual value to your outdoor area.
Water damage weakens unsealed pavers. Rain and moisture can enter pores, causing cracks. Sealing blocks this entry and helps surfaces resist water damage. This gives them better strength and durability. As a result, the surface holds firm through wet seasons and heavy rain cycles.
Another clear gain is control of weed growth. Unsealed gaps allow roots and weeds to rise through. A sealed surface closes those gaps and limits growth. This makes outdoor upkeep much easier to handle. With fewer weeds, the paved space looks neat for longer spans.
Cons of Sealing Pavers
The cons are also clear. The first cost may feel high for some. Sealers are not free, and the job needs both tools and time. For large driveways, the cost grows further, which must be planned and should be included as part of broader hardscape maintenance.
Maintenance is another factor. A seal is not permanent. Over time, it needs reapplication to stay effective. Each reapplication adds more work and cost to the life of your pavers. Knowing this helps set the right time frame for care.
Some glossy sealers may cause slipperiness. This can be a risk if used in wet zones. It is important to choose a sealer type that balances grip and shine. These paver maintenance tips and insights on how to prevent mold and mildew help set the right expectations and guide wise choices.
When & How Soon to Seal Pavers
Timing Is Key for Best Results
After new pavers are laid, wait at least 60–90 days before sealing. This pause allows the base to settle and lets natural salts escape from the surface. If sealing occurs too early, trapped moisture causes white haze and weak bonding. The wait ensures a firm and steady outcome. Holding back the urge to rush gives your surface more life. A cure period also supports a stronger grip of the seal on each stone. It is also wise to learn how to clean pavers before sealing to ensure the best possible bond. Patience here pays back with years of a stronger hold.
Ideal weather is also vital. The process works best on dry days with a steady, mild temperature. When the heat is too strong, the sealer dries unevenly. When it is too cold, the coat may not cure well. Rain after sealing can undo the entire effort. The surface must stay dry until the seal sets fully. Picking the right day ensures you seal pavers for longevity and strength. Correct timing avoids waste and ensures a coat that endures. A calm climate gives balance, while steady sun helps curing. Careful choice of season ensures an even, lasting layer.
Tools and Materials You’ll Need
Gather Everything Before You Start
Before you begin, gather all supplies in one place. Having the right items on hand ensures smoother progress. Choosing the best paver sealer and the correct tools early prevents delays and gives lasting strength.
Tools
Pressure Washer: A pressure washer clears deep dirt from pores. It also removes moss and stains that stick tight. Using strong water flow prepares clean and seal pavers. This tool saves time and ensures your surface is well prepared.
Hose: A hose works when pressure wash is not an option. It removes surface dust and light debris. While less strong, it still helps prepare the site. A steady rinse keeps surfaces free of loose grime.
Broom: A broom is vital to sweep loose dirt and sand. This step ensures the seal contacts clean stone. A neat sweep avoids flaws in coverage. Daily use also extends general surface neatness.
Stiff Brush: A stiff brush helps scrub areas where dirt clings. With force, it reaches gaps and rough spots. This tool supports full prep of the surface. Strong strokes improve reach into deep joints.
Roller: A roller spreads sealer in smooth, thin coats. It gives control over large flat areas. This method allows a steady pace and uniform cover.
Sprayer: A sprayer speeds work and gives even mist coats. It is useful for broad surfaces needing quick cover. A sprayer saves effort when large areas are sealed.
Masonry Brush: A masonry brush is used on edges and joints. It gives details where rollers or sprayers cannot reach. This tool is vital for a precise finish on tight spots.
Materials
Water-Based Sealer: A water-based sealer is simple to apply and safe. It leaves a natural look while giving strength. Added ease of clean up makes it a good choice.
Solvent-Based Sealer: A solvent-based sealer bonds deeper and lasts long. It gives rich color and more gloss, but needs care. Proper handling ensures a stronger and longer life of the coat.
Tape: Tape helps mark borders and prevents stray marks. It keeps lines neat and sharp. Clean and seal paver edges, adding to the appeal of the finished space.
Plastic Sheeting: Plastic sheeting protects walls, plants, and nearby items. Spread it wide to avoid sealer spray. Proper cover avoids costly cleanup later.
PPE: PPE is non-negotiable. Gloves guard skin, and a mask shields from fumes. Wear them each time for safe work. Good gear also brings more focus and comfort.
Step-by-Step Process to Clean and Seal Pavers
How to Seal Pavers Correctly
Step 1: Thoroughly Clean the Pavers
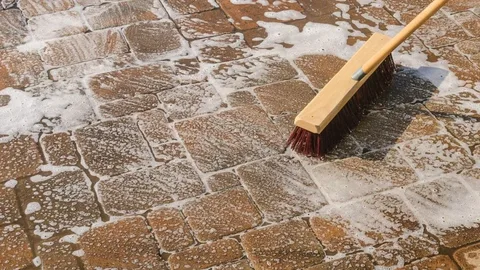
First, sweep to clear dust and leaves. Then, power wash to remove dirt, mold, and salt buildup. Your surface must be spotless before the seal. A neat base always ensures strong and smooth coverage. A clean start always leads to the best results.
Let the pavers dry fully for 24–48 hours. Moisture under a seal creates cloudy marks. Full drying prevents future problems and makes the seal more effective. Extra dry time supports a longer life of the protective coat. This step locks in quality and avoids weak bonds.
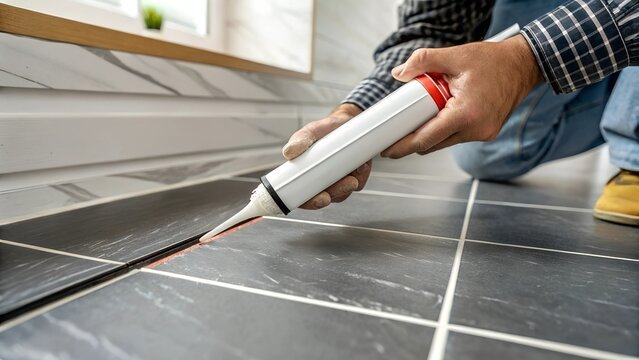
Step 2: Refill / Stabilize Joints
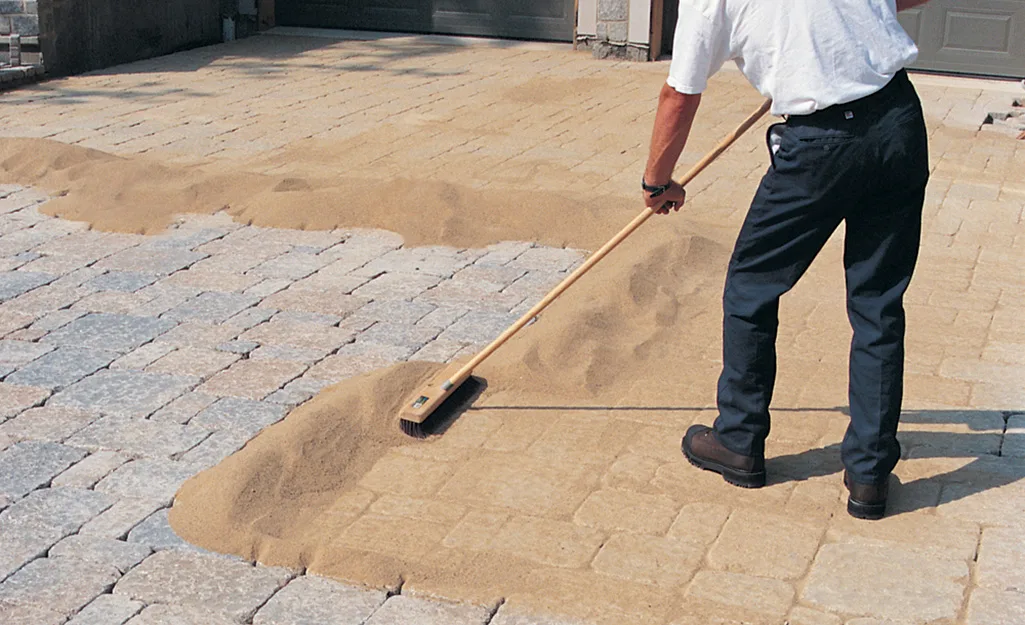
Fill the gaps with polymeric sand or joint stabilizer. This step keeps weeds down and secures the pavers in place. It also reduces movement that can spoil the surface later. Keep the fill even to avoid later dips or shifts.
Compact and level the sand. This makes the surface firm and stable, ready for the sealing stage. A solid joint bed also adds to overall strength. A steady joint layer improves both look and hold.
Step 3: Repair and Replace Damaged Pavers
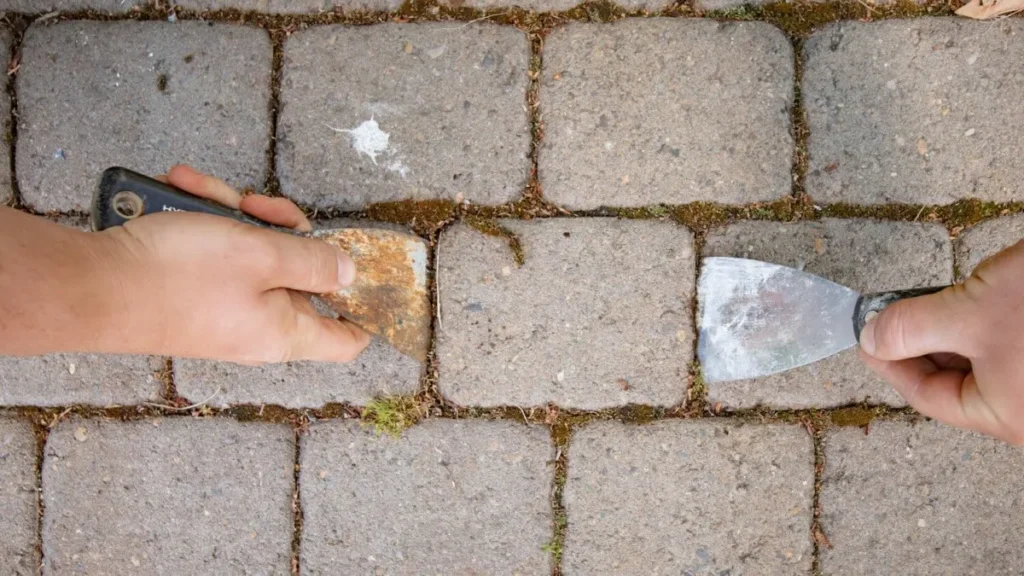
Before sealing, check for cracks or broken pavers. Replace any damaged stones to ensure a neat and long-lasting result. Repairing now avoids sealing flaws that will later grow worse. Take your time in this stage since it sets the tone for the finish. Careful repair also helps the seal hold better and look uniform. Fixing flaws early makes the finish far more durable
Step 4: Apply the Sealer
Apply thin and even coats using a sprayer or roller. Avoid pooling or excess buildup. Smooth coverage ensures balanced results. Adding layers slowly gives better finish control. Each pass should feel light and steady.
Edge zones need care. Use a brush for corners and borders. This precision keeps the job neat and avoids overlaps. Clean edges add polish to the whole area. Crisp borders improve the full look of the paved space.
Step 5: Allow for Curing
Avoid foot traffic for at least twenty-four hours. Vehicle traffic must wait 48–72 hours, depending on product type. This pause ensures the seal bonds well and strengthens fully. Rushing this step will ruin the effort. Treat this stage as critical for the best outcome. The wait here decides the long-term hold of your work. Giving time now prevents cracks and flaws later.
Step 6: Inspect and Recoat if Needed
After curing, check for missed areas. Any thin or bare spots should be corrected right away. A fast fix prevents deeper wear over time. Quick action here avoids large repair jobs later.
Some products may require a second coat. Apply after the first coat has cured enough. This gives a balanced, lasting protection that holds against wear. Added coats enhance both shine and defense for years. Extra layers bring depth, beauty, and a stronger guard.
Choosing the Right Sealer
Match the Sealer to Your Needs
Water-Based Sealer: These sealers are easier to apply and safer for the environment. They leave a natural look while still providing strength. They are often chosen by those who want simple use and safe clean up.
Solvent-Based Sealer: These provide stronger bonding and deeper color enhancement. They may last longer but require more care during use. Extra caution with fumes and tools is always required.
Penetrating vs Topical: Penetrating sealers soak deep into pores. They offer invisible strength without altering the surface look. Topical sealers form a visible layer, giving more shine but needing more upkeep. Each type has its role, and the choice must match your aims.
Wet Look Finish: Wet look sealers darken the tone, giving a rich and bold finish. This style appeals to those who want a glossy, striking appearance that stands out more.
Natural Finish: Natural finish sealers keep the original appearance while still offering protection. They suit users who want to preserve the true shade and tone. This finish blends well with soft or rustic outdoor styles.
Breathability: Breathability is vital. Without it, trapped moisture leads to surface damage. A breathable sealer balances protection with ventilation. This prevents buildup and supports long-term results.
Climate Needs: Climate must guide your choice. In cold regions, freeze-thaw cycles stress surfaces. The best paver sealer must resist this challenge. In hot regions, UV resistance becomes key. Pick according to local needs and your exact setting.
Maintenance After Sealing
How to Keep the Finish Looking Good
Regular sweeping keeps the surface clear. Leaves, soil, and grit build up fast if left. A neat sweep each week helps pavers stay bright and sound. This habit also blocks the growth of weeds that creep in.
Regular washing is just as vital. A gentle rinse clears fine dust and light dirt. Use mild soap with water when grime grows heavy. This step maintains a fresh look and prevents dull tones.
Stains must be removed quickly. Oil or food spills break down the coat if ignored. Fast action avoids deep marks and keeps the surface safe. Treating stains soon is one of the top paver maintenance tips to follow.
Reapply the sealer every 2–3 years. In harsh climates, do it sooner. New coats restore shine and shield. Renewal keeps the bond strong and extends the life of the paved area.
Avoid harsh chemicals at all times. Strong acids or bleaches ruin the protective coat. Instead, use gentle cleaners that are safe. Mild solutions keep the seal intact and protect your finish for years.
Common Mistakes to Avoid
Watch Out for These Pitfalls
Sealing too soon is a mistake many make. Moisture trapped below creates haze and weak spots. Waiting ensures full dry time before the seal is set.
Applying too thick a coat is another error. Thick layers cure unevenly and stay sticky. Thin coats applied in steps give better strength and an even finish.
Using the wrong type of sealer over an existing layer leads to peeling. Always check the product type and confirm it is right for the surface. Careful choice prevents waste and poor results.
Ignoring joint sand weakens the paved base. Loose sand allows shifts and weed growth. Refill joints firmly before sealing to lock strength and support. This keeps the paved area steady for years.
Skipping a test patch invites trouble. Colors may darken more than planned, or the finish may not suit. A small test ensures you know the outcome and avoid regret.
Conclusion
Protect Your Pavers for the Long Haul
Proper prep is the first step for success. Cleaning, drying, and repairs set the right base. Without these steps, the result will not last long. Extra care in early steps creates a strong and lasting base for sealing. At FC Paint Pro Wash, we make sure every surface is perfectly prepared to deliver lasting and professional results.
A good sealer is the next part of the plan. The right choice adds both look and strength. Matching the coat to your climate and style ensures a firm hold and bright tone. A wise product choice makes the outcome steadier and long-lasting.
Maintenance then locks in all the gains. Regular sweeping, stain care, and fresh coats keep the surface strong. With this routine, your paved area stays neat and durable. Ongoing upkeep ensures strength and keeps your paved zone looking its best.
Always begin with a small test area. This trial shows the true shade and helps avoid unwanted shocks. Care at this stage saves time and cost later. A small check helps reduce risk and guides a smoother sealing job.
Pick a quality sealer today and give your outdoor surfaces the protection they deserve. Careful action now ensures pride in your outdoor space for years.
FAQs
Paver Sealing Questions Answered
The usual cycle is 2–3 years, though harsh weather can shorten this span and demand faster care.
Yes, but care and patience are needed, since skipping details leads to poor results, while following a guide ensures lasting success.
They fade, stain, and weaken sooner, which reduces both beauty and strength, but protection through sealing greatly extends their life.
Wait at least 48–72 hours before driving, since heavy loads too soon can harm the coat and undo your hard work.
Some do. Wet look sealers deepen tone, while natural finish keeps it closer to the original. Knowing how to seal pavers well ensures balance. With the right method, you also seal pavers for longevity.