
A smooth finish can change how your whole kitchen feels fast. Many people paint cabinets with high hopes but feel let down later. Brush lines, dull patches, and weak grip ruin the look. A smooth professional cabinet finish does not require rare skill. It needs calm steps, clear prep, and smart paint use. When done right, cabinets feel fresh, clean, and solid. Now lets see how simple habits bring real change.
Most paint issues begin before any paint meets the surface. Weak prep, bad tools, and fast drying often lead to rough results. With the right steps, anyone can reach a smooth professional cabinet finish at home and upgrade kitchen cabinets with confidence. You might notice better flow, fewer marks, and strong color hold. This guide breaks the process into easy, clear actions. Each step saves time, stress, and redoing work later.
Why Achieving a Smooth Professional Cabinet Finish Matters?
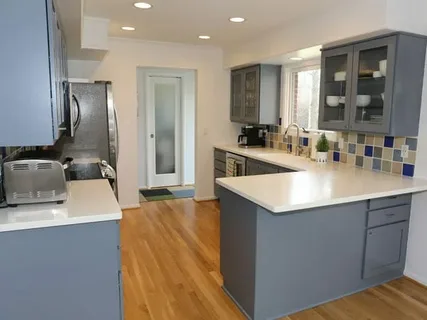
Cabinets shape how a kitchen feels every single day. They cover large areas and catch light fast. Small flaws become obvious during daily use. Drip lines or dull patches pull attention away. A smooth cabinet paint finish makes spaces feel clean, calm, and complete. When cabinets look right, the whole room feels balanced. This visual impact explains why finish quality truly matters.
Many people try painting yet miss key steps. The result feels uneven and rushed. A professional cabinet finish needs care, not speed. This guide shows proven cabinet finish techniques used by pros. Each step supports a smooth professional cabinet finish that lasts. With patience and smart choices, results feel solid and refined. The effort pays off every time. It helps owners avoid regret and enjoy cabinets daily again.
1. Proper Cabinet Surface Preparation
Why Preparation Determines Final Results?
Cabinet surface preparation decides how paint looks and lasts over time. Paint bonds well only to clean dull wood during kitchen cabinet painting. Skipping prep often causes peeling streaks and rough texture. Grease, shine, and old layers block paint grip. These flaws become worse after drying. Strong prep protects effort and supports proven cabinet finish techniques.
Essential Preparation Steps
Cabinets often hold grease even when they seem clean. A strong degreaser removes hidden buildup fast. The old cabinet finish must be removed before new paint goes on. Light sanding breaks surface shine and weak layers. Dents and chips need filler to level surfaces. These steps create a solid paint base.
How to Prep Cabinets Correctly?
Start by applying the degreaser and scrubbing all cabinet areas well. Let surfaces dry fully before sanding begins. Sand lightly using even hand pressure only. Remove all dust using a clean dry cloth. Dust ruins paint grip and flow fast. Careful cabinet surface preparation supports a smooth cabinet paint finish and lasting cabinet finish techniques.
2. Sanding Cabinets the Right Way

Common Sanding Mistakes
Sanding cabinets properly is often rushed and causes problems later. Many people press too hard and damage edges fast. Over-sanding removes shape and weakens corners. Uneven pressure creates waves that paint cannot hide. Skipping fine-grit sanding leaves scratch marks visible after drying. These mistakes stop a smooth cabinet finish from forming and waste effort. Careless sanding also increases paint use and redo work.
Best Sanding Practices
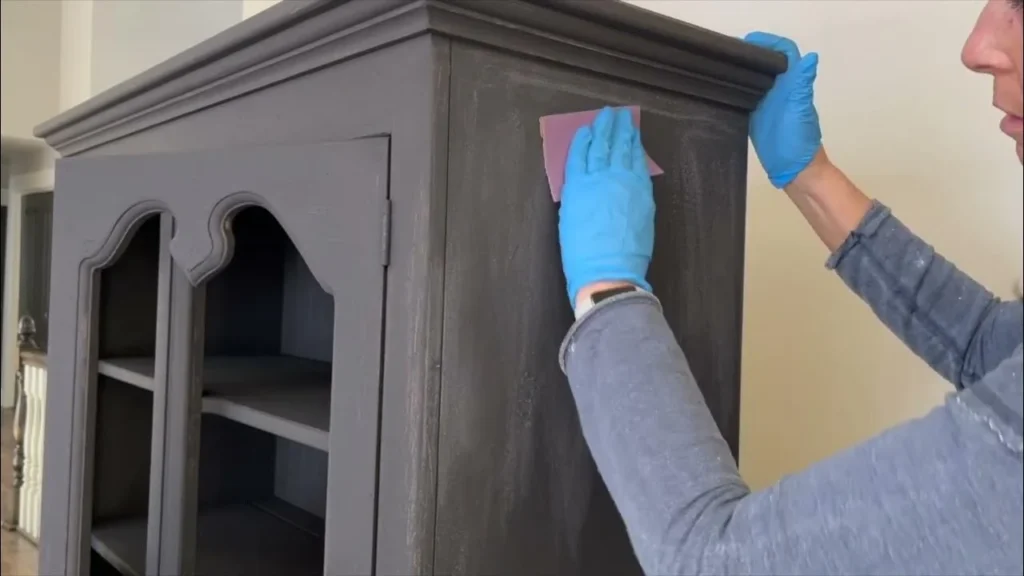
Start sanding cabinets properly with medium-grit paper first. This removes shine and helps paint grip well, a step valued in commercial painting standards. Always sand in one steady direction for balance. Switch to fine-grit paper to smooth the surface next. Use light even pressure and take your time. This method supports a smooth cabinet finish that looks clean and even. Good sanding improves paint flow and final texture.
Final Surface Checks
After sanding, wipe all dust away fully. Dust blocks paint grip and creates bumps. Use a clean, dry cloth for best results. Check edges and flat areas by touch. Smooth surfaces should feel even and dull. These final checks help secure a smooth cabinet finish that lasts longer and looks professional every day.
3. Choosing the Best Paint for Cabinets
Why does Paint Type Affect Smoothness?
Paint type controls how cabinets look after drying. Low-quality paint often dries unevenly and thickly. This leads to brush marks and rough texture. Poor paint does not level on wood well. Flaws become clear under kitchen lighting. The right paint flows slowly and settles flat. Smart cabinet painting tips always begin with paint choice. This step shapes the final feel more than tools.
Best Paint Characteristics
The best cabinet paint finish feels smooth and firm after curing. Durable paint handles daily use without chipping. Self-leveling formulas reduce visible lines during drying. Smooth drying surfaces help color stay even. Paint made for cabinets resists heat and moisture better. These features support a clean and lasting look.
Smart Paint Selection Tips
Always read paint labels before buying. Look for cabinet-specific paint options. Test paint on a hidden area first. This shows drying behavior and texture. Avoid thick coats, even with good paint. Thin layers give better results. These cabinet painting tips help achieve a smooth, professional cabinet finish with less effort.
4. Brush vs Roller vs Sprayer
Brush Finish Pros and Cons
Brush painting gives strong control over edges and tight areas. It helps reach corners and trim with ease. This method suits small touch-ups well. The main risk comes from visible brush marks. Heavy strokes leave lines that stand out after drying. How to paint cabinets smoothly with a brush, light pressure matters. Thin coats reduce texture and flaws. Brush work needs patience and steady hands.
Roller Finish Results
Rollers give even coverage across flat cabinet faces. They spread paint fast and save time. Foam rollers reduce texture and help paint level well. This makes a smooth cabinet paint finish easier to achieve. Rollers still need care on edges and joints. Light passes work better than heavy loads. This tool suits most home projects well.
Sprayer Finish Benefits
Sprayers deliver the cleanest results overall. They create an ultra-smooth surface with no contact marks. Many pros use this method for a roller vs sprayer cabinet choice. Sprayers offer a true professional cabinet finish look. Prep and control matter most with this tool.
5. How to Avoid Brush Marks and Streaks
Why Brush Marks Appear?
Paintbrush marks on cabinets often come from rushed work. Overworking paint pulls it before it can level, a common issue in residential painting. The wrong brush type drags paint and leaves lines. Cheap brushes shed and scratch surfaces. Improper drying time causes streaks and dull patches. Thick coats trap air and texture. These issues block a clean, smooth look. Knowing the cause helps fix the result fast.
Techniques for a Smooth Finish
Cabinet paint application tips focus on control and patience. Use high-quality brushes made for smooth paint flow. Apply thin coats and let them settle fully. Paint in long, steady strokes across each panel. Stop brushing once the paint starts to set. Allow full drying before the next coat. Light sanding between coats helps level the texture. These habits reduce marks and support a smooth professional cabinet finish.
6. Applying Thin Even Paint Coats
Why Thin Coats Work Best?
Thin paint coats allow better control and cleaner results. Thick coats trap air under the surface and dry unevenly. This often causes drips, sagging, and rough texture. Heavy layers also take longer to cure and attract dust. Paint cannot level when applied too thick.
Thin coats flow better and settle flat. This approach supports a smooth professional cabinet finish that feels clean and refined. Most cabinet paint application tips stress patience over speed. Slower work avoids fixes later and protects your effort.
Best Application Method
Use multiple light coats instead of one heavy layer. Dip tools lightly and remove extra paint before applying. Spread paint evenly across each section with steady movement. Avoid going back over paint once it starts to set. Let each coat dry fully before adding another. Proper drying helps paint harden and level. This method builds strength and smooth texture over time. It also reduces marks and streaks.
Final Coating Tips
Check surfaces under good light between coats. Light sanding can smooth tiny flaws. Wipe dust away fully before repainting. These cabinet paint application tips help secure a smooth, professional cabinet finish that lasts and looks polished every day.
7. Managing Cabinet Paint Drying Time
Why Drying Time Is Critical?
Cabinet paint drying time controls how strong the finish becomes. Touching paint too early ruins smooth flow and leaves marks. Soft paint attracts dust fast and traps it inside. These flaws stay visible after curing. Rushing this step damages effort and time. A calm wait protects a smooth professional cabinet finish and keeps surfaces clean and firm.
Best Drying Practices
Follow paint manufacturer guidelines for each coat. Every paint type dries at its own pace. Maintain proper airflow to help paint set evenly. Use fans gently without blowing dust. Avoid humidity since moisture slows drying. Stable air keeps paint hard and smooth. These steps support a professional cabinet finish that lasts longer and looks clean.
Smart Waiting Habits
Let the cabinets rest before rehanging the doors. Give paint enough time to cure fully. Check dryness by touch only in hidden spots. Keep pets and traffic away during drying. Clean, calm spaces protect paint quality. Careful timing improves cabinet paint drying time and preserves a smooth, professional cabinet finish for daily use.
8. Final Sanding Between Coats
Why Light Sanding Improves Results?
Final sanding improves the paint’s feel and look greatly, a key step in best interior painting results. This step removes dust nibs trapped during drying. Small bumps appear even in clean rooms. Light sanding smooths these flaws fast. It also helps the next coat bond better. Skipping this step leaves rough spots visible.
Proper cabinet finish techniques always include sanding between coats. This habit leads to an ultra-smooth texture that feels even to the touch. The finish looks calm, clean, and balanced after this step.
How to Sand Between Coats?
Sanding cabinets properly between coats needs care and patience. Use very fine-grit paper only. Light pressure works best for control. Do not press hard or rush. Sand just enough to smooth the surface. Focus on flat areas and edges gently. Stop once the surface feels even. Heavy sanding can cut through paint fast and cause damage.
Cleaning After Sanding
Always clean the surface after sanding ends. Dust left behind ruins the next coat. Use a clean, dry cloth to wipe fully. Check corners and edges by touch. Clean surfaces help paint flow and level well. This step protects all cabinet finish techniques and supports sanding cabinets properly every time.
9. Achieving Long Lasting Results
Factors That Affect Durability
Professional cabinet painting results depend on a few core factors. Paint quality plays a major role in long-term strength. Cheap paint chips and dulls faster. Surface prep also matters from start to end. Clean, dull wood helps paint bond well. The application method affects how paint cures and holds. Thin even coats last longer than thick layers. These steps shape the best cabinet paint finish over time.
How to Maintain a Smooth Finish?
A smooth finish needs gentle care after painting. Use soft cloths for regular cleaning. Avoid harsh chemicals that break paint strength. Strong cleaners dull shine and weaken grip. Light care keeps the surface calm and clean. This habit protects the best cabinet paint finish and keeps cabinets looking fresh daily.
Cure Time and Daily Use
Allow full cure time before heavy use. Paint may feel dry, but it still stays soft inside. Early use can leave marks and dents. Give cabinets time to harden fully. This step locks in professional cabinet painting results. Patience helps maintain a smooth professional cabinet finish that lasts for years.
Conclusion
A smooth professional cabinet finish comes from doing the basics right. Careful preparation sets the foundation for lasting paint. FC Paint Pro Wash follows light sanding to remove flaws and support even coverage. The right paint helps cabinets feel smooth and strong. Slow thin coats help stop marks and drips. Proper drying time allows paint to harden and settle well. Each step works together to shape the final result.
Rushing often leads to regret and extra work later. Taking time saves effort and protects your space. When each stage gets proper attention, cabinets feel clean and solid. The finish feels clean, steady, and never rushed. Use this guide to get a smooth, professional cabinet finish that lasts.
FAQs
A smooth professional cabinet finish starts with strong prep and calm work. Clean all surfaces well before painting. Sand lightly to remove shine and flaws. Use thin coats with steady tools. Allow full dry time between coats. These steps help paint level and stay strong over time.
Brush marks often come from thick paint and weak tools. Low-quality brushes drag paint across wood. Overworking the surface pulls paint before it settles. Rushing between coats also adds texture. Light strokes and patience reduce these issues.
Spraying gives the smoothest look when done with care. It spreads paint evenly without contact marks. Rolling still works well with foam rollers and thin coats. Both methods can succeed with proper control.
Most cabinets need two or three thin coats. Thin layers build strength and smooth texture. Thick coats cause drips and a long dry time.
Dry time depends on paint type and air flow. Many paints need several hours to a full day. Always follow maker guidance for best results.